Listen to the full episode to hear how I scaffold solving equations.
*In this blog post, I talk mostly about one-step equations. I use this as review for my 8th graders.
Breaking Down Solving Equations
Scaffolding solving equations has been a passion of mine since my first year of teaching.
During my first year, I remember we used this awesome packet that started off with combining like terms, distributive property and then moved into a scaffolding solving equations practice. I was THRILLED! It was going to give us so much data and insight into where students were.
But I noticed something. My 8th grade students were struggling with basic one-step equations. They knew they had to use inverse operations and what you do to one side, you do to the other. But the foundational actual understanding of the problem was not there.
I watched a student…a top performing student…work through this problem.
I watched them incorrectly add 7 to both sides, giving the answer “x=26.” When I questioned the student about this, asking “Looking at your answer, does 26 make sense for the equation? Does 26 make the equation true?”
The student was stumped. When you add 7 to 19, you get 26, so it has to make the equation true.
That’s when the fire and mission of solving equations with TRUE understanding became a passion of mine in the classroom.
So today I am going to break down how I scaffold solving equations so students can truly learn and understand what it means to solve for x.
Let's Talk "The Basics"

Part 1: Equal signs are never liars.
No matter where my students seem to be, I always start at the basics. I remove the x and replace it with a blank.
Looking at the first problem, “3 + __ = 15” I follow this line of questioning:
- What goes in the blank?
- How did you know it was 12?
- And why does 12 belong in the blank?
- Why do both sides need to be 15?
Number 3 always gets me weird looks because they feel like they just answered that in question 2. But it is essential to understanding that both sides of the equal sign need to be the same.
And both sides HAVE TO BE 15 because the equal sign declares it to be true. Equal signs are never liars. Both sides HAVE TO BE 15. That’s why 12 goes in the blank.
Because 3 added with 12 makes 15, it helps the statement to be true. We are striving to make the equation whole by finding it’s missing puzzle piece.
Part 2: Equal signs are all about balance
Now that we are covered the essence of the equal sign, we need to tie it to the real world. (Yes, the math classroom is the real world too. But I’m talking outside of the classroom.) Remember we need to make math meaningful, relevant, and relatable. There are lots of connections that you could make to solving equations or specifically balancing.
- Lifting weights, specifically a barbell
- Old timey weighing scales
- Seesaw
Lifting weights is my favorite analogy to make. When you are lifting a barbell, you need to make sure both sides have the same amount of weight. Otherwise it’s going to be uneven and it could hurt you. Plus once we get to talking about inverse operations, it is a great visual for what you do to one side, you have to do to the other. Equal signs are all about balance.
One-Step Equations
Part 1: Intuition Method
Before we as a class discuss inverse operations, we try to solve equations using what I call the “Intuition Method.” It’s similar to the 3 + __ = 15 but with a variable replacing the blank. It leads to a more natural understanding of inverse operations and why that helps solve for the value of the variable.

When I put this on the screen, I ask the questions:
- What would x have to be to keep it balanced?
- What could x be to unbalance it?
I give students some “private think time” and then have them turn to discuss with their A/B partner.
Once we determine that 3 would keep it balanced, I ask if it would still be balanced with the “x+5” and “8” switch sides and why. This helps solidify the thought that the two sides are equivalent and therefore interchangeable.
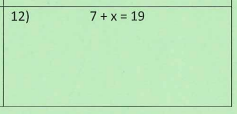
Next I pose this equation: “x-7=19”
I get one of two answers: 12 or 26. To this I ask, “How can we be sure?” This brings the conversation of checking our answer by exchanging x for the value we think it is. If it makes sense, then we’re good to go. If not, we need to try again.
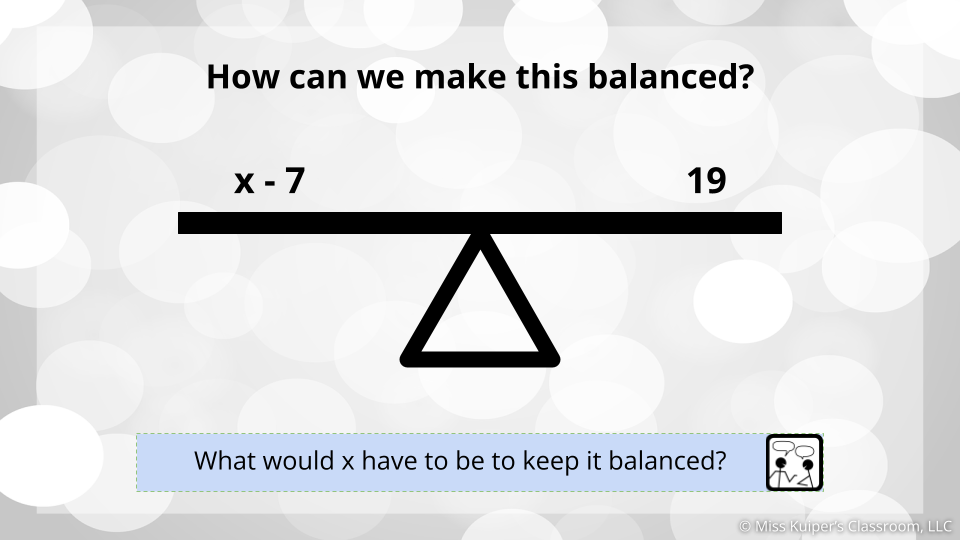
But how can we try again, if we don’t know the answer?
Part 2: Inverse Operations…kind of
This is where the idea of inverse operations begins. If we don’t know what minus 7 creates 19, how can we mathematically figure it out?
I have students turn and discuss with a partner. I find that asking them to come with 2 or 3 ideas helps them navigate the question better. I love to see the creativity that some of the students come up with! One year, I had a student suggest using a number line to count 7 spaces from 19. Another student shared that we could “guess & check with a calculator.” And then typically a student brings up the idea of inverse operations by saying we could add 7 to 19 to find the value of x.
While that last one helps lead into the conversation of inverse operations, it is important to validate all of the responses. We even try them each out as they are shared to show they work! Math is such a creative subject in the sense that there isn’t just one way to do things. Yes, these is typically one answer to a problem, the but the journey there is up to personal interpretation.
So I have that conversation with students. I am going to teach you multiple ways to go about solving for the value of x. Sometimes I will ask for a certain method when we first learn about it, but most of the time, my students get the freedom to choose the method that works best for them.
Let’s dive deeper into inverse operations.
When we walk through the x-7=19, I still use the phrasing, “We know that something minus 7 equals 19.” Our goal is for students to think about it that way because that helps bring meaning to it.
But this time we aren’t so sure. Then we remember that the number minus 7 equaling 19 is the same as 19 + 7! X equals 26.
I typically talk about what you do to one side, but I am doing it differently this year. Too many times I’ve seen students get hung up on the algorithm rather than the logic of the problem. I’ll probably introduce it for 2 step equations. I’m testing this theory fully this school year, so stick around to see the results!
From here, I give students a practice of just one-step equations involving addition and subtraction.
Then the next day, we talk about multiplication and division.
It’s a very similar process to what we did with addition and subtraction. Working with 4x=28, first we break it down so that student know that the 4 and x are being multiplied together. If you taught distributive property before this, then you can refer to that to help students remember.
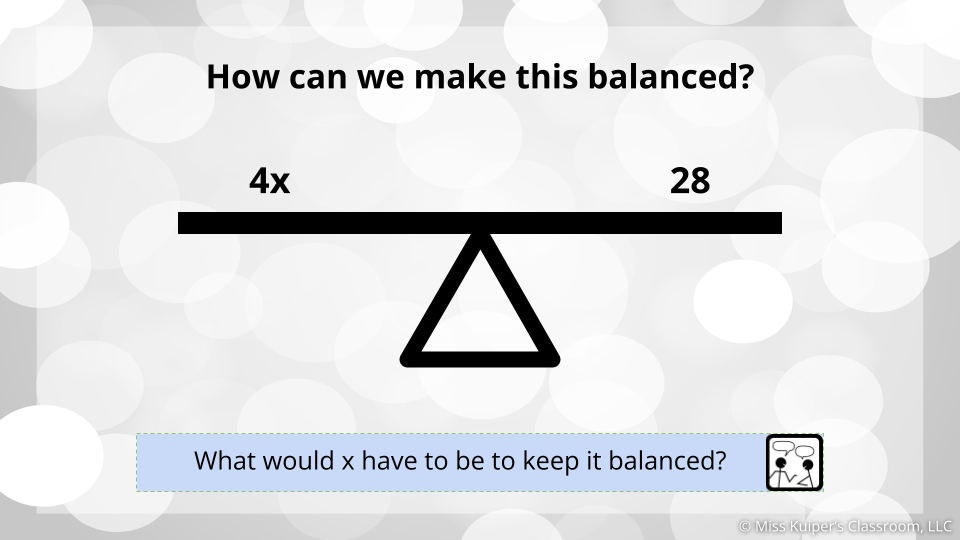
I like to use the analogy that multiplication is shy and doesn’t always show it’s face / sign. I talk about how addition, subtraction and division all show their signs. (Plus, minus, fraction bar, etc.)
You can also bring up that 4x is 4 x’s being added together to make 28. This idea can be helpful if you use Algebra Tiles or Hanger Method.
Multiplication is just repeated addition. So the equation is says that 4 x’s together make 28. So four times what number makes 28? 7! But what if you are unsure? This brings up back to what we did with subtraction earlier. A number times 4 equaling 28 is the same as 28 divided by 4. So we can confidently say that 7 is the value of x!
Division is similar to this, but is represented in two ways as you can see below.
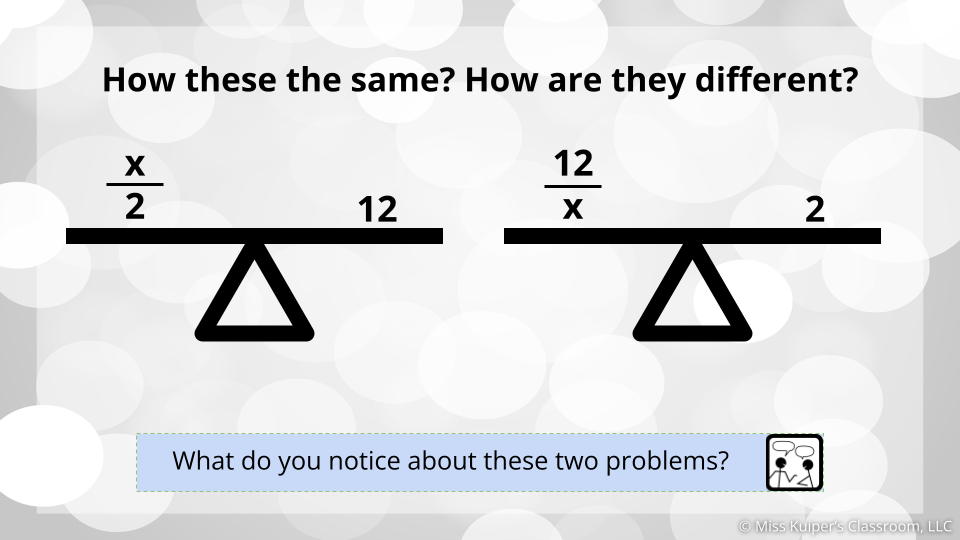
With this, I display the left side and ask for students to “translate it into words”. A number divided by two equals 12. After, I ask them what number would be there. At first, most of them say 6. Before an explanation, I show them the second one. “How are these the same and different?” This helps hem self-correct if needed that the first one is 24 and the second is 6.
Then to bring it home, we talk about how a number divided by 2 equaling 12 is the same as 2 times 12. Hence 24 is the correct value for the left equation.
And that pretty much wraps up Solving One-Step or One-Operation Equations!
Part 3: Hanger Method
Because this model is a visual one, I have included a link to an explanation on how to teach it and a video of someone working out problems using the hanger method.
Two-Step Equations
The next level of solving equations is the Two-Step or Two-Operation Equations. This process is very similar to that of one-step equations. But we are adding one more thing before being able to find out what the answer is.
Let’s take 2x + 8 = 14 for example. I want to start again with the “intuition method” because again I think it helps students best understand what the equation is “saying” before using rote techniques.
First, we break it down. Ignoring the 2x, what plus 8 = 14? 6 + 8 = 14.
Now that I know that 6 + 8 = 14, I know that 2x has to equal 6. So because the 2 and the x are being multiplied, I need to figure out 2 times what gives me 6. 3! So the value of my x equals 3. And we plug it back in to make sure that is true → 2(3)+8=14, 6+8=14, 14=14. BOOM! You can do more examples with division, subtraction, fractions, or negative numbers to hammer it in, but after the conversation about 1 step equations, I find that most students get the hang of the idea.
One thing to note, and I maybe should have mentioned this earlier, is I try to use only “nice” numbers when we are starting out. Meaning I want to make sure that the answer comes out to be a whole number. And the reason I do this is to help students truly grasp what the equation is saying and what value x has. When students have trouble with number sense, decimals tend to make things even more challenging. By starting with nice numbers, I am better ensuring the success of my students understanding the concept of solving equations before making it more complicated.
So let’s chat about inverse operations with 2-operation equations. Using the equations 2x+8=14 again, what if we are unsure of what plus 8 equals 14. We need to get out our detective skills and isolate the variable. To do that, we want to move +8 first. It’s easiest to move because it isn’t attached to the variable. (And you can later explain why mathematically we have to move the +8 first, but that isn’t something I do here.) To move the +8, we need to make it into NOTHING. What number represents nothing? Zero! So how do we make plus 8 into zero? What do we need to do? Again, this line of questioning is ESSENTIAL from moving students from following a list of directions into ACTUALLY understanding why inverse operations work. We need to subtract 8. What we do to one side, we do to this other. Equal signs are all about balance. That leaves us with 2x = 6. If we are unsure here, what do we need to do? This is telling us that 2 xs makes 6, but we need to figure out what 1 x makes. By dividing by 2, this will show us what 1x equals. What we do to one side, we do to the other. Equal signs are all about balance.
You might be beginning to notice that I repeat the same lines over and over again. That’s because on average, someone needs to hear or see something 7 times to really take action on something. It’s called the rule of 7. But by repeating the same line with what I am doing, it can help solidify the process and why we do something to solve for the value of x.
I also show students how to use Algebra Tiles and the Hanger Method for two-step equations. They have very similar rules in how they are used, just slightly different representations.

SolveMe Mobiles is one of my favorite equation-like activities. It isn’t a direct translation to equations, but the idea of balancing and solving for a value is. Try it out here!
Multi-Step Equations
Part 1: Box Method
I got the idea for this method from Idea Galaxy Teacher. I was struggling to find a way that wasn’t overwhelming for students. This is an organized way to help students solve equations with variables on both sides.
Read the article here! (You have to scroll a little bit to get there)
Or for a quick view of how to use the Box Method, watch my Instagram Reel here!